


By Jules Rhee, MEd | Latest update 7/16/2024
This is a step-by-step guide for teachers on how to assign students one or two slides in Google Classroom or Google Drive for distance learning.
You’ll learn how to reduce the size of a teaching resource so you can assign just a few slides in Google Classroom or Google Drive rather than a large document.

Why would a teacher want to shorten a Google Drive resource?
Some Google resources are just too long to assign all at once.
Teachers might want to limit the amount of homework or differentiate assignments for students.
For example, a Google Drive resource might have 20 or more slides included. Most teachers aren’t going to assign 20 slides at a time. Maybe they only want to assign one or two.
Follow these steps for assigning just a small part of a larger resource using digital resources made for Google Drive.
Easy-to-follow steps
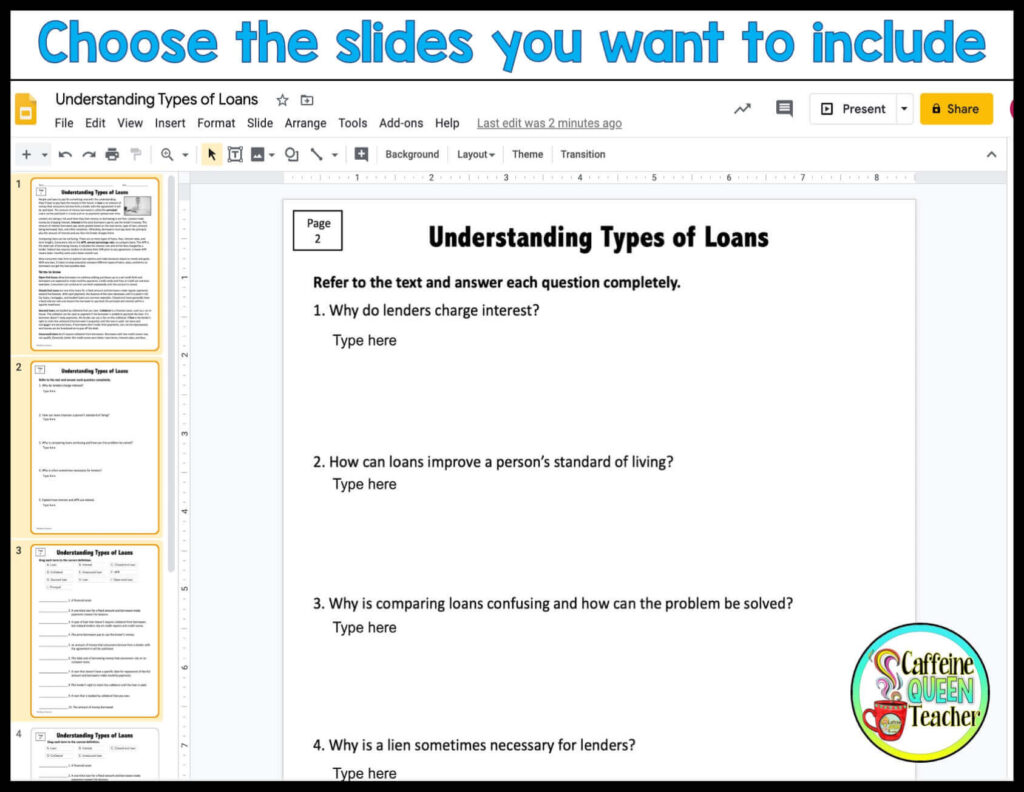
1) Open up the Google Drive file you want to use.
On the left-hand side, choose the slides you want to send to your students. You might have to hold down the shift button or the command button on a Mac. The slides you chose should be highlighted.
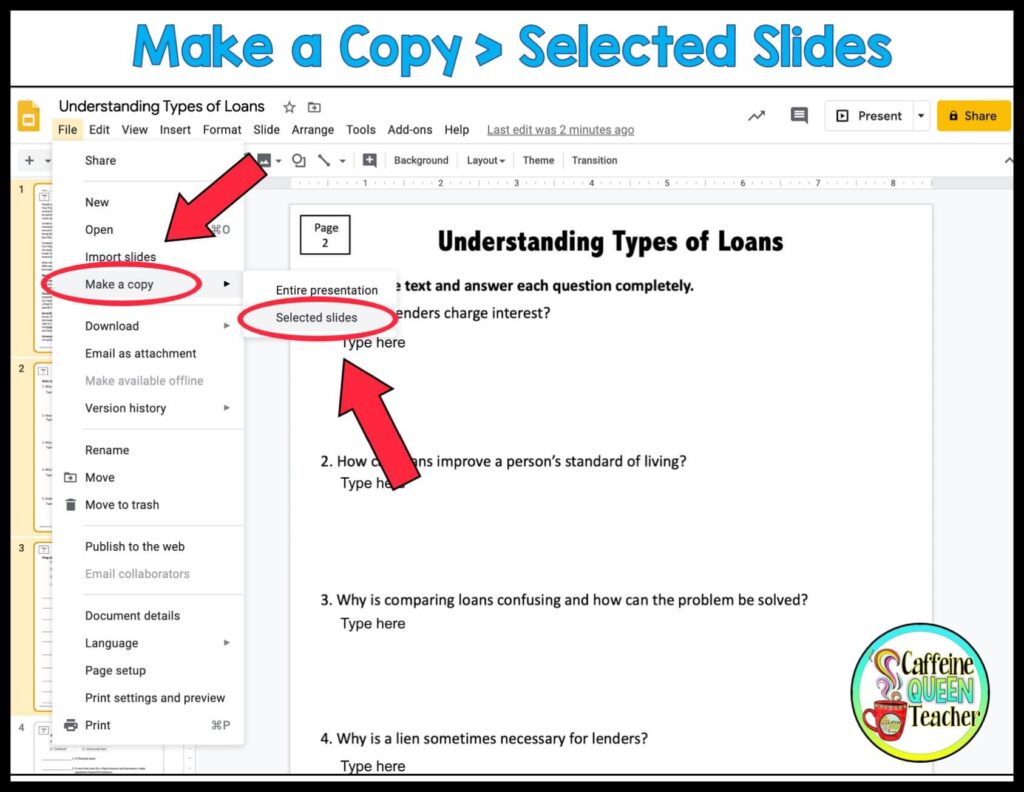
2) Click on the File tab and then on Make a Copy. Choose Selected Slides.
3) Give the file a new name and click the OK button.
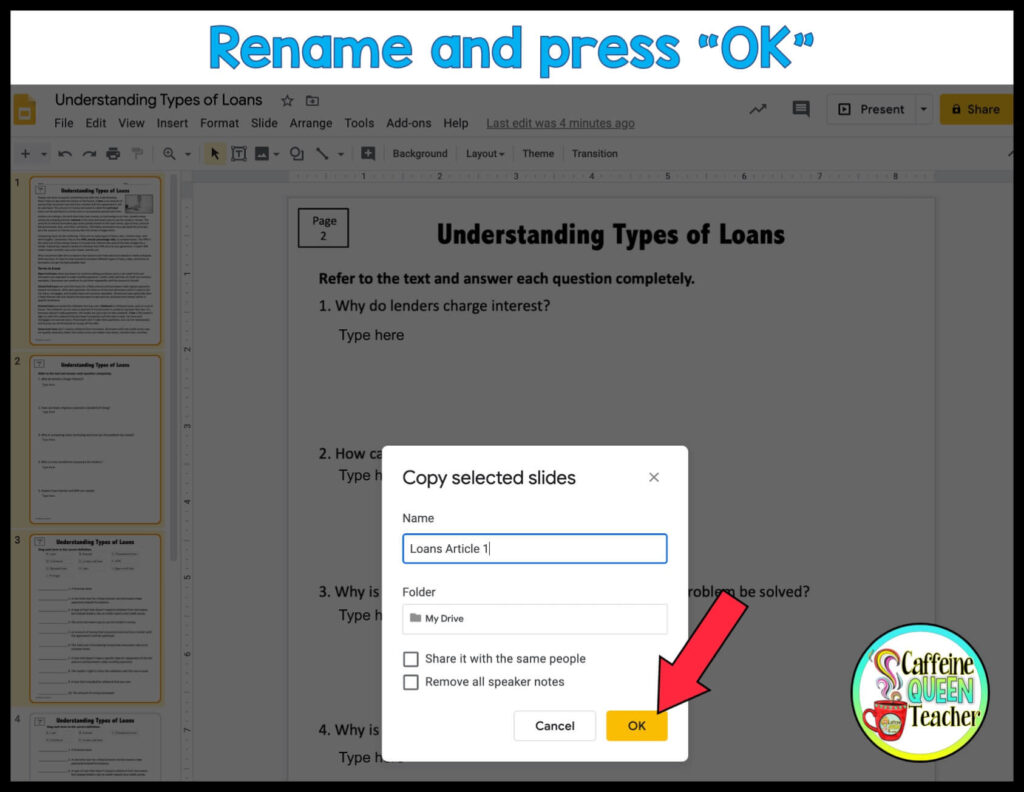
4) A new window will open up with your new file.
You probably want to move it into a new folder specifically for that resource in case you want to assign it again in the future.
5) Assign the new file the way you usually do with Google Classroom or through Google Drive.
I hope you found these steps easy to follow!
More about converting resources to digital and using Google
Step-By-Step: Convert PDF Worksheets to Digital for Distance Learning
How to Assign Student Work with Google Classroom
If you plan to use Google Classroom, there’s also a FREE Google Chrome Extension you can use.
Shop this article
Interested in the Understanding Types of Loans resource shown above? Check it out at my Teachers Pay Teachers shop.
If you found this article helpful, please follow me on Teachers Pay Teachers, Pinterest, Facebook, and Instagram. I post educational content that can help you in your own classroom.
Thank you for being a part of the Caffeine Queen Teacher community! Your support means a lot to me. Together, we can make learning fun and interesting!
About the Author
Written by Jules Rhee, MEd, and a 30-year teaching veteran; published 4/19/2020; latest update 7/16/2024.
Jules is the creator of Caffeine Queen Teacher (CQT) – Visual Math Organizers + Graph Paper Support. She’s a veteran teacher with over 30 years of classroom experience (SPED, upper elementary, and middle school) and a Master’s in Education (MEd). Jules shares practical, classroom-tested ideas and creates step-by-step resources that help students stay organized, confident, and successful – especially with multiplication and long division.
Read more about Jules here: About Page | Browse resources here: TpT Store