


By Jules Rhee, MEd | Latest update 8/9/2023
To read Teaching Money Skills Part 1, click here!
In Part 2, we’ll cover coin sorting, identification, assigning value, and counting mixed coins.

If you’ve been following along with our Teaching Money Skills Blog Posts, you’ll recall that after Part 1, our students have progressed to the point where they can easily distinguish each coin based on its size, edge ridges, and appearance.
To continue building their coin skills, we now introduce the concept of sorting coins. The faster and more accurately they can sort them, the better. Our goal is for students to look at a coin and instantly know whether it’s a quarter, dime, or nickel without thinking twice.
I have found that a basic coin-sorting mat is effective for simple coin sorting. Containers, bowls, or even a divided piece of paper can serve as a sorting mat. It doesn’t need to be fancy.
Click the image below to grab the FREE Coin Sorting Mats.
The set will download to your computer immediately, so you might need to check your downloads folder. Some computers and schools use download-blocking software. If you have trouble, try downloading from a personal computer.
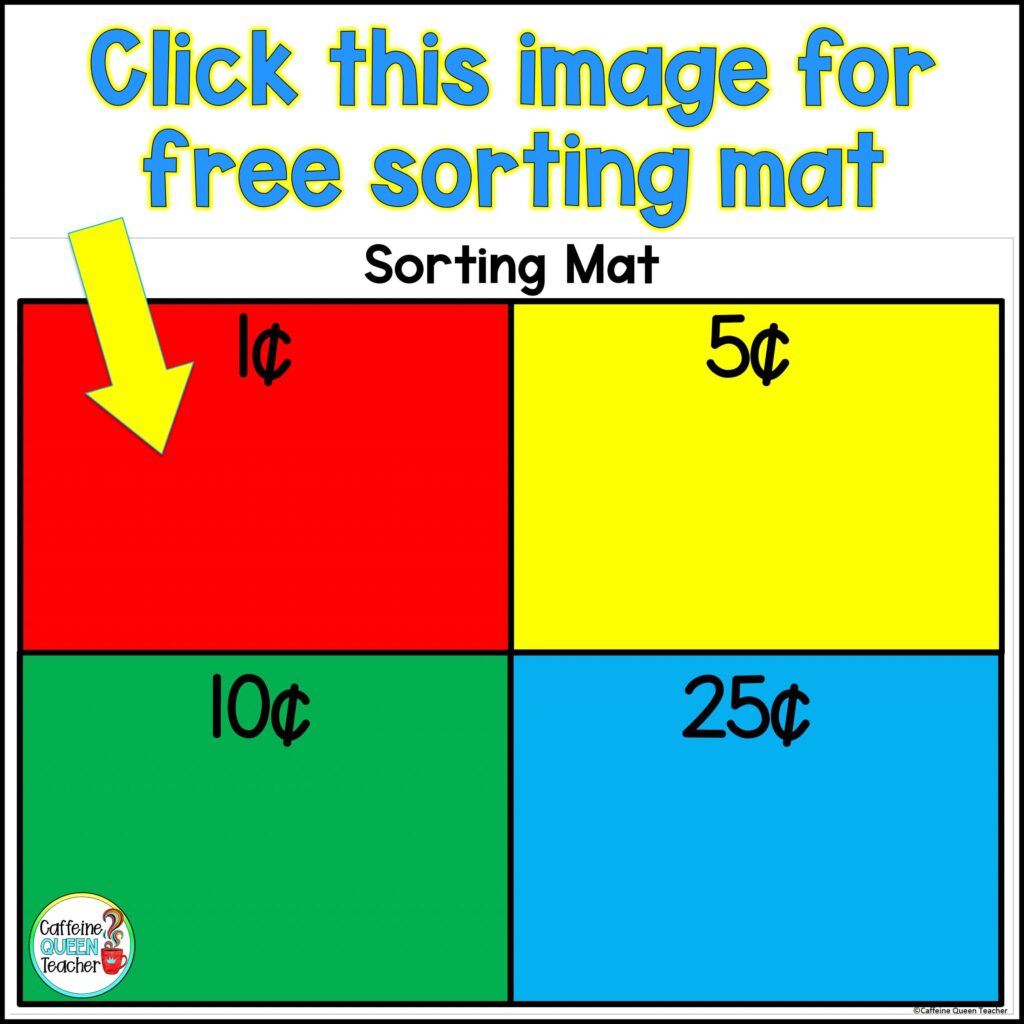
You can customize the different versions of sorting mats, such as with or without coin denominations, for students to use for practice.
They also provide a quick and easy way to assess your students’ abilities. With just a glance, you can see if they can tell a dime from a nickel or if they’ve mastered the skill of sorting.
Here’s how I use them in my classroom:
First, I provide each student with a coin sorting mat and a small pile of mixed coins (pennies, nickels, dimes, and quarters – no half-dollars). Their task? Sort them correctly. It’s that simple.
With just a glance, you can assess students’ proficiency in distinguishing between different coin values.
Identify and Assign Value
Now is a great opportunity to see how well your student can identify and assign value to coins.
Can your student name each coin? Can they quickly and confidently tell you the value of each coin?
If the answer is no, your student needs more practice. We want them to be able to identify coins without even thinking about it.
You can easily assess their knowledge by casually asking them to show you a nickel, a quarter, and so on. Then, test their skills by requesting them to show you a dime or a coin worth five cents.
Many of my students would simply call a coin “the 10¢” or “the 10.” They needed more practice remembering the correct names of the coins.

If a student is struggling with this, try adding an intervention at this point. Peer tutoring and computer games can be helpful tools. It’s important for students to fully understand this skill before moving on to the next step.
Consider revisiting the coin sorting mat and encourage students to sort coins using pictures or actual coins as a guide.
As students place a dime on the mat, they can say, “A dime is ten cents” or “A penny is one cent.” It’s important to engage multiple senses at this foundational stage. Reference posters can also provide extra support and reassurance for students.
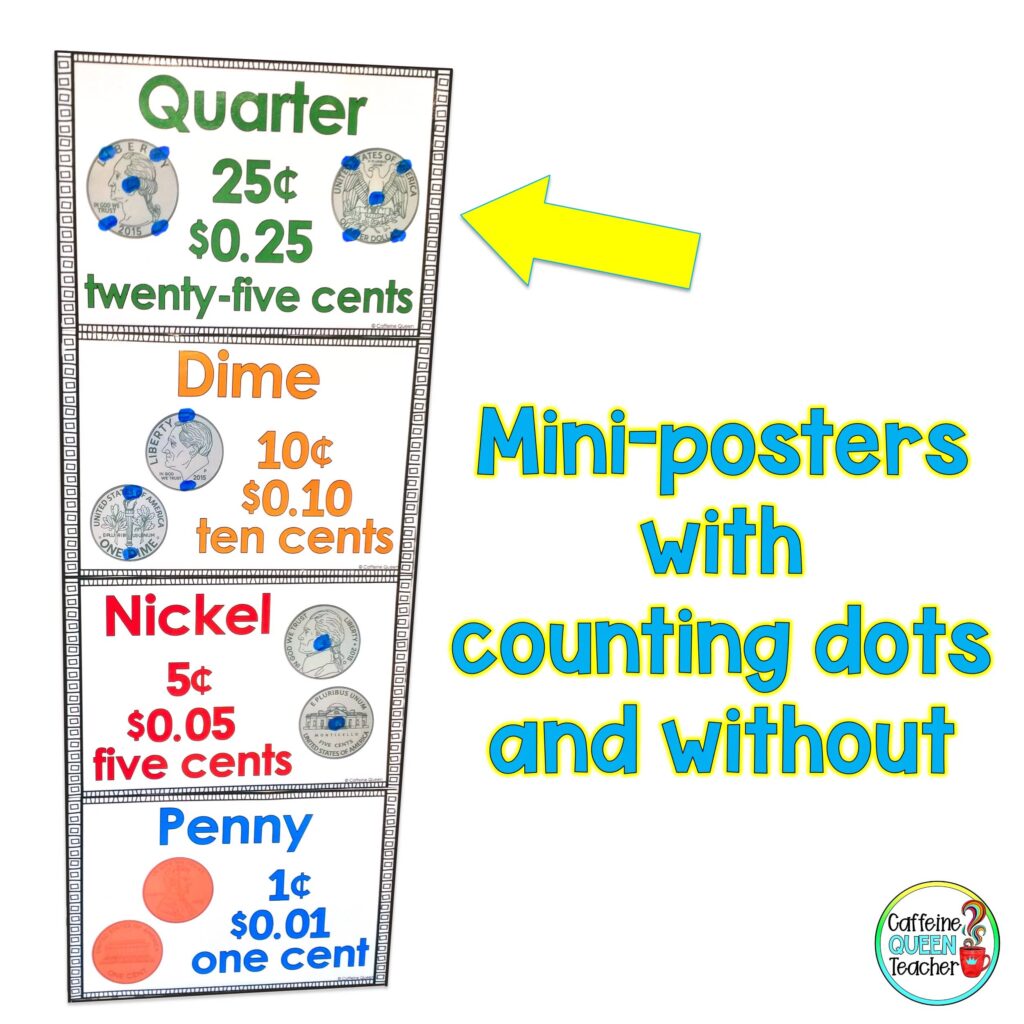
Check out these simple mini-posters with counting dots or mini-posters without counting dots available in my Teachers Pay Teachers shop.
In the picture above, you can see that I printed and laminated the posters without counting dots. I then added the counting dots using dry-erase markers. This way, as my students improve, I can easily erase the dots when they have mastered counting.
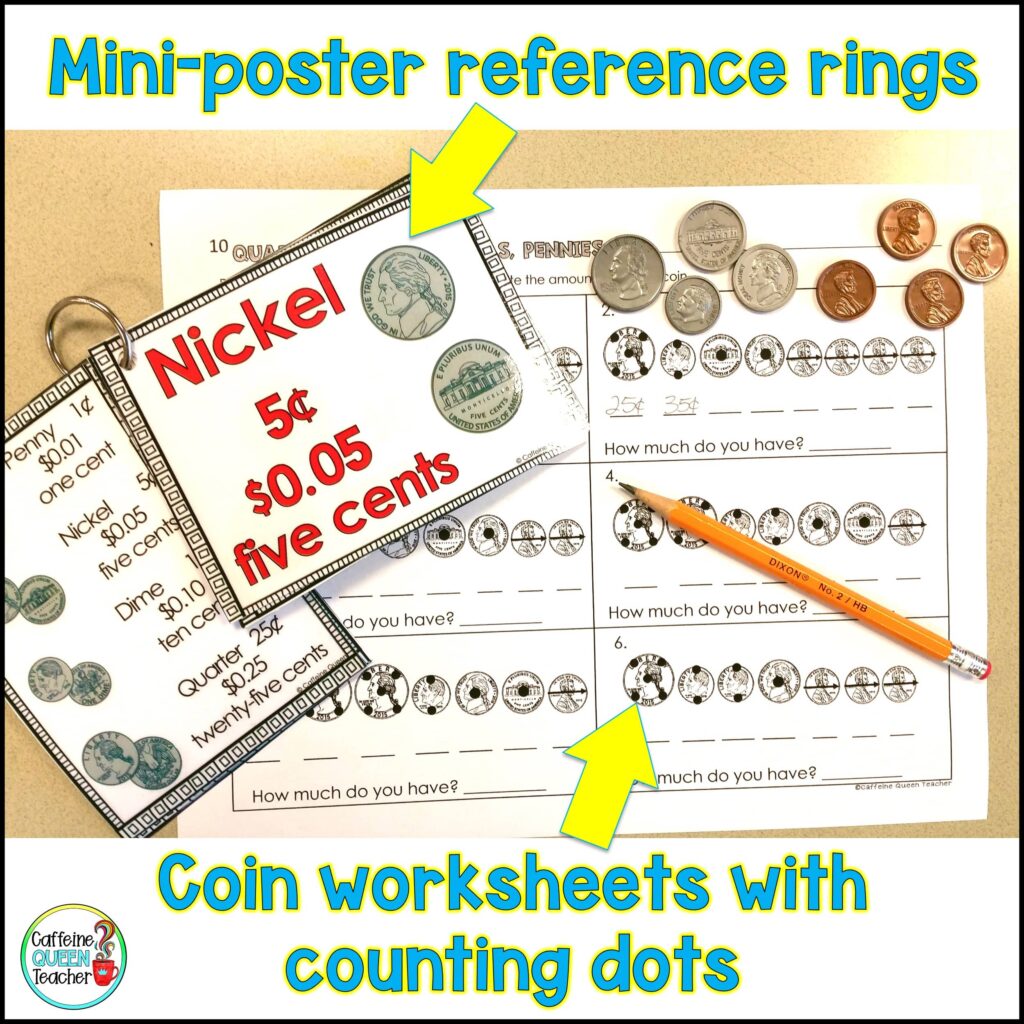
Check out the student reference rings made from the mini-poster set in the picture above. These rings were a helpful tool for my students. I always had sets of reference rings with counting dots and several sets without the dots to differentiate for students’ needs. The worksheet above is from the coin counting dots worksheet set.
In my experience, students love working with money manipulatives, so I often allowed them to work in small groups or with a partner. However, be sure to differentiate the instruction.
Depending on the activity, pairing a proficient student with a struggling student can be beneficial for both. The proficient student can provide help and peer tutoring, but it’s important to make sure the struggling student is actively participating and not relying too heavily on their partner.
I’ve found that with a little guidance, students are usually eager to help their classmates learn money skills. After a brief explanation, proficient students often enjoy working with their peers on these skills.
Once students can name the coins and understand their values, it’s time to dive into coin counting.
Basic Coin Counting
To effectively count mixed coins, students must first master counting coins of the same denomination. In fact, I can’t stress it enough – starting with a single denomination is extremely important.
Single Denomination Coin Counting
I start with pennies. Students should be able to count pennies fluently with one-to-one correspondence. This may take struggling students extra practice. As you assess students counting pennies, make sure they don’t become so rote with their counting that they miscount. It’s not unusual for students to count faster than they point to coins.
To tackle this challenge, I have a helpful approach.
I set a pile of pennies on the table and ask the student to slide each penny across a small distance to a new pile as they count. If they make a mistake, I count along with them to guide their counting. If a student struggles with one-to-one correspondence, I take a step back and use larger counters like teddy bears or pencils.
Once students are comfortable with pennies, we move on to nickels. For proficient students who are able to skip count, this is another fairly easy step, but this is where you’ll discover which students are still struggling with skip counting.
This is a great spot to review the hundreds chart and number lines.
My small group created number lines and practiced placing nickels on the fives. While skip counting, we would notice how much faster it is to count by fives compared to counting by ones.
To count nickels, we moved one nickel at a time and counted by 5s while maintaining one-to-one correspondence.
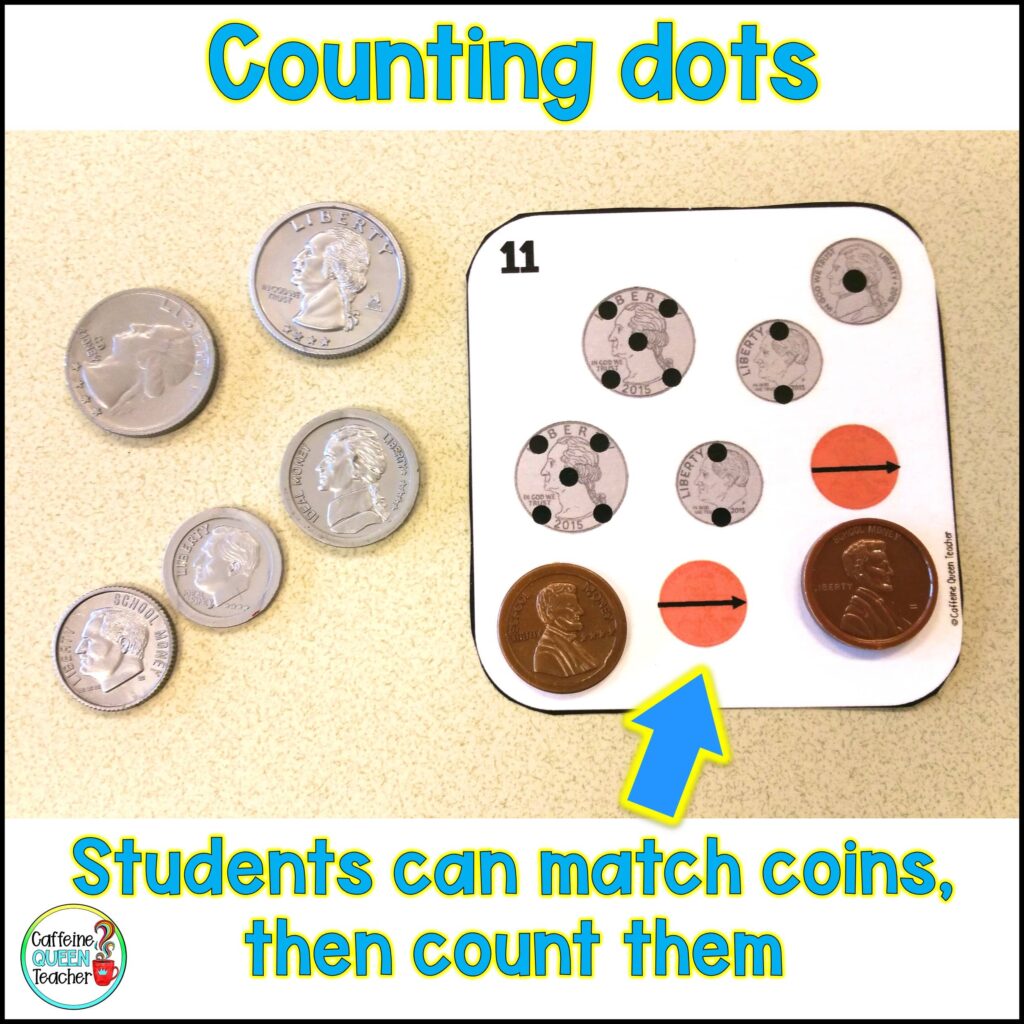
Introducing counting dots can be helpful at this stage. These dots provide a visual and concrete way for students to touch and count each coin. Each coin has a specific place for students to touch and count. If a student can count by 5s, they can count money using the dots.
We know struggling students often benefit from visual representations. Take a look at the picture below to see the arrangement of the counting dots.
In my classroom, I used visual reference posters and small reference rings to help struggling students. They absolutely loved the rings, and they all wanted a set for themselves.
If you’re looking for coin and money resources, I have plenty in my Teachers Pay Teachers Store.

I drew counting dots on my plastic classroom coins and strongly encouraged my strugglers to use them.
What’s great about the counting dots is that they can be used anywhere discreetly – students can learn to use them without actually having dots on the coins. Students can confidently count without drawing attention to themselves.
As students become more confident in their counting skills, the dots can gradually be faded away. Students won’t need the visual aid anymore; instead, they can simply touch the spot on the coin where the dot would be as they count. This boosts independence and confidence.
Mixed Denomination Coin Counting
Proficient students can move on to the next skill – counting mixed coins.
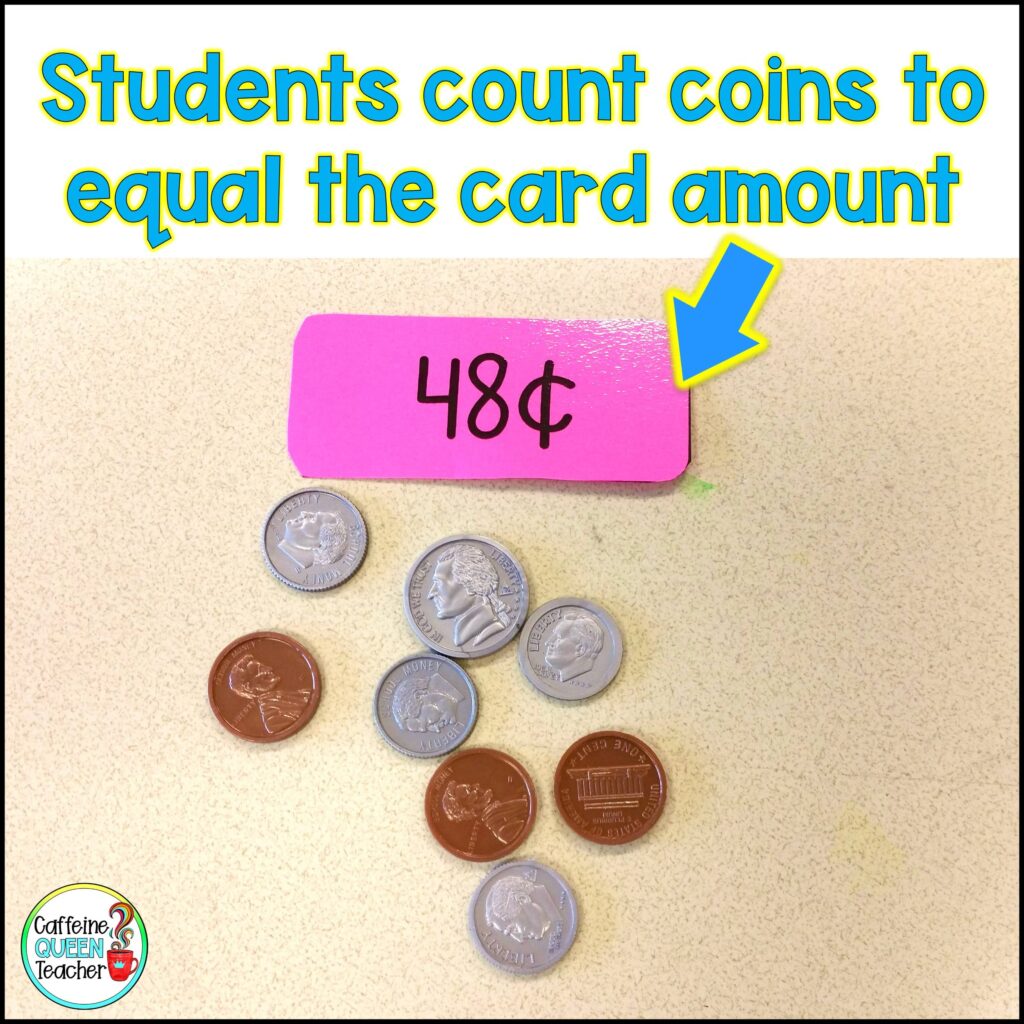
Slip the blank coin sorting mat into a plastic page protector sleeve. Use a dry-erase marker to write various coin amounts on a plastic page protector. Challenge your students to make those amounts using the coins.
Or give students a small pile of coins and let them determine the total amount, then write it on the sorting mat.
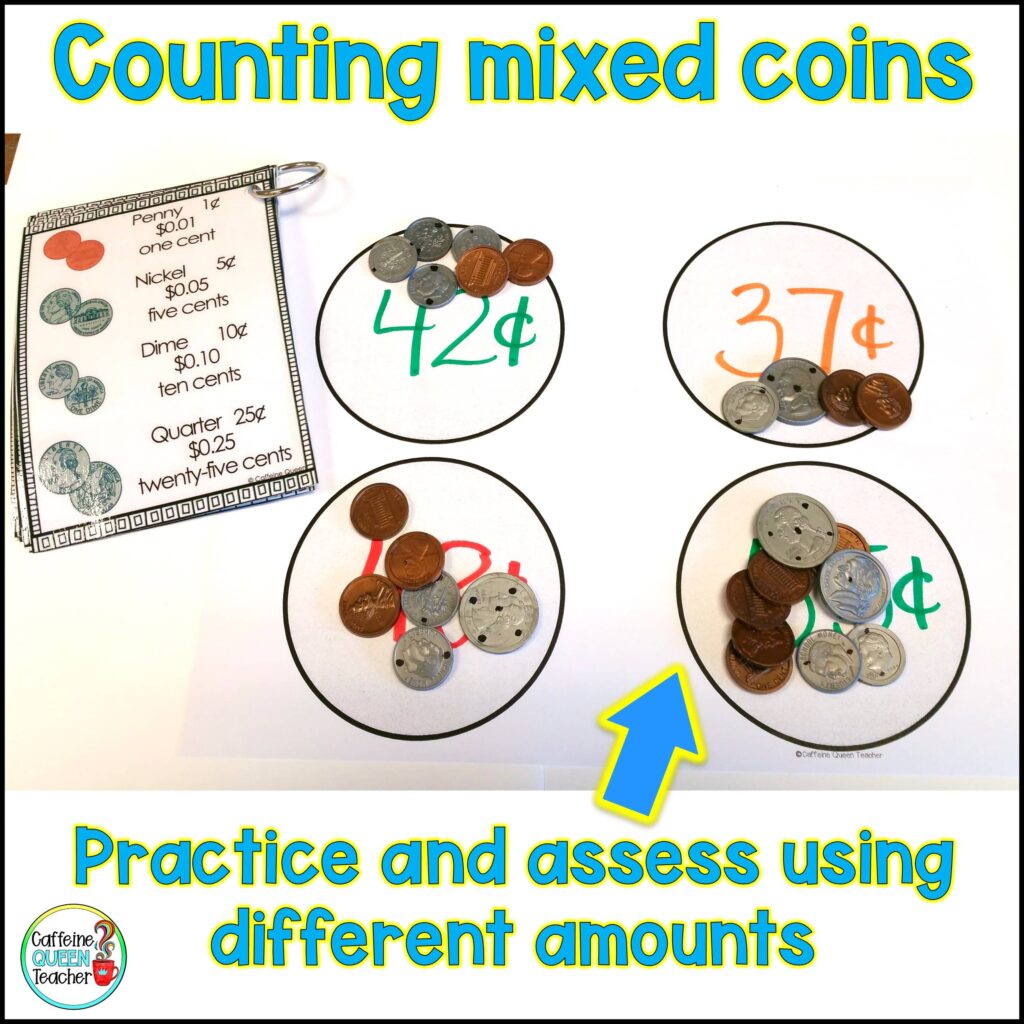
Start off with a simple task to assess students’ skill levels. Use two types of coins and ask the students to make 15¢. This will help us understand each student’s skill level.
Can they combine a nickel and a dime? Or do they try counting out 15 pennies instead? If there are no pennies available, can they still do it? This is an area where we really need to focus on practicing and improving.
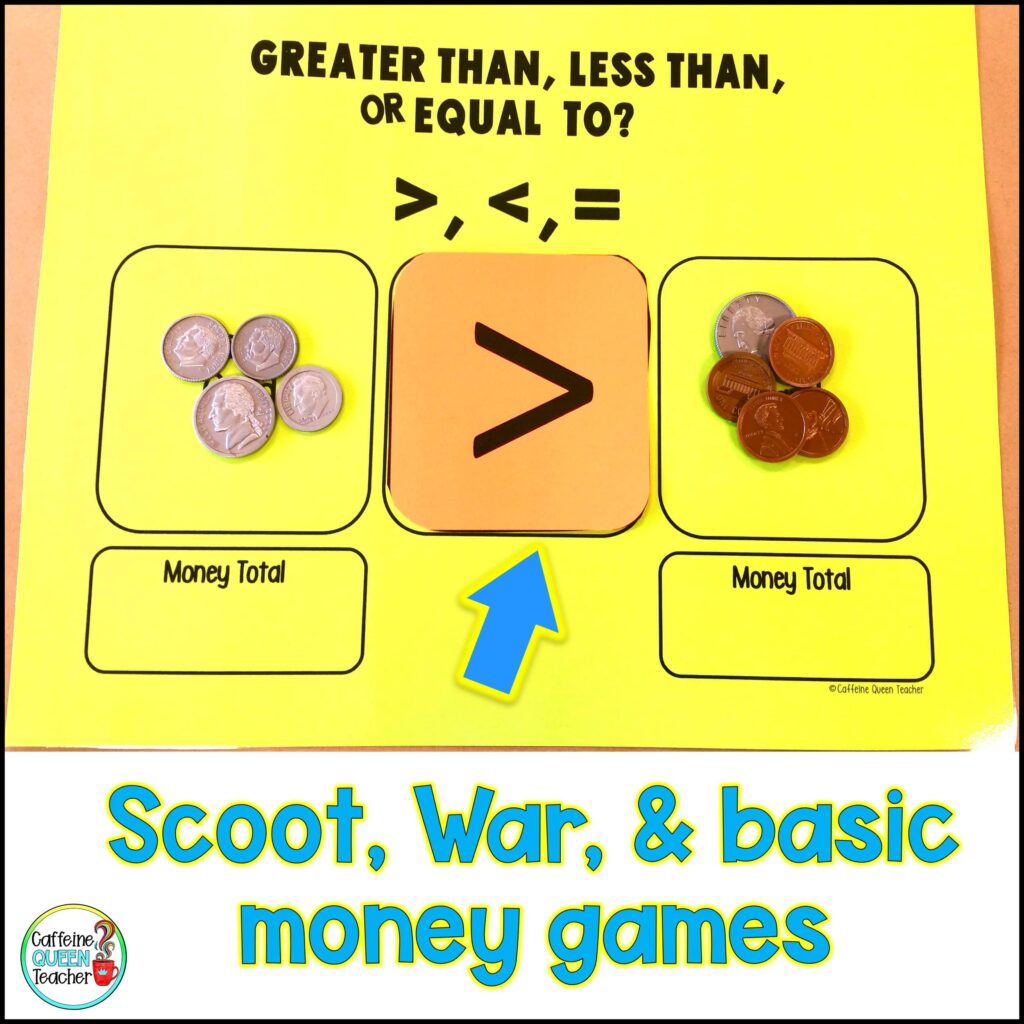
As your students become more skilled, challenge them with more complex tasks. Start with task cards and gradually build up to playing games like “I Have, Who Has.”
Keep strengthening students’ skills by varying the amounts and number of coins they sort.
If you have some struggling students, I encourage you to check out the Counting Dots Bundle of resources in my Teachers Pay Teachers store. Here’s a link to all of the money resources.
What about paper money? After students become confident in counting coins, they can typically apply those skills to paper money.
Paper money is exciting for students because it represents big bucks and makes them feel more grown-up. My students absolutely loved working with large dollar amounts. Their motivation would often skyrocket.
Final Tips
- Make learning as visual and concrete as possible – use posters, reference rings, and counting dots
- Model how you count money – with and without counting dots
- Practice skip counting over and over and over and over and over and over and over and over and over . . .
- Practice daily in different ways – computer games, classroom money, coin rubbing, coin sorting pads, games, stations, etc.
- Include parents. Most parents enjoy involving their children when making a purchase and counting money.

Looking for the time-saving money bundle featured in this article?
Visit my Teachers Pay Teachers store to check it out!
About the Author
Written by Jules Rhee, MEd, and a 30-year teaching veteran; published 5/3/2017; latest update 8/9/2023
Jules is the creator of Caffeine Queen Teacher (CQT) – Visual Math Organizers + Graph Paper Support. She’s a veteran teacher with over 30 years of classroom experience (SPED, upper elementary, and middle school) and a Master’s in Education (MEd). Jules shares practical, classroom-tested ideas and creates step-by-step resources that help students stay organized, confident, and successful – especially with multiplication and long division.
Read more about Jules here: About Page | Browse resources here: TpT Store