


By Jules Rhee, MEd | Latest update 2/20/2025
Make compare & contrast essays click for students with engaging visuals and paired passages – similar to those on state tests! This step-by-step method builds confidence and critical thinking.
Sometimes, you have to slow down to speed up. Strange advice, but true when teaching compare and contrast essays.
Taking the time up front to help students organize their thoughts and ideas makes a big difference in the long run.

Explicitly Teach Writing (Because More Practice Isn’t Always the Answer)
Students can tell you how two things are alike and different without missing a beat.
But ask them to put those thoughts into a well-structured essay? That’s where things get messy.
And here’s the truth: more writing practice won’t magically fix it.
Instead, students need:
- Clear, step-by-step instruction
- A way to organize their thoughts before writing
- A structured approach that eliminates guesswork
- Real essay examples – both strong and weak – to see what works (and what doesn’t)
That’s exactly why I created this Compare & Contrast Essay Lesson – to break the process down into manageable, test-ready steps.
Here’s how I scaffold writing instruction to help students master compare-and-contrast essays with confidence.
Start with the Basics: Defining Compare and Contrast
Before students can write a strong compare-and-contrast essay, they need to clearly understand what those terms mean.
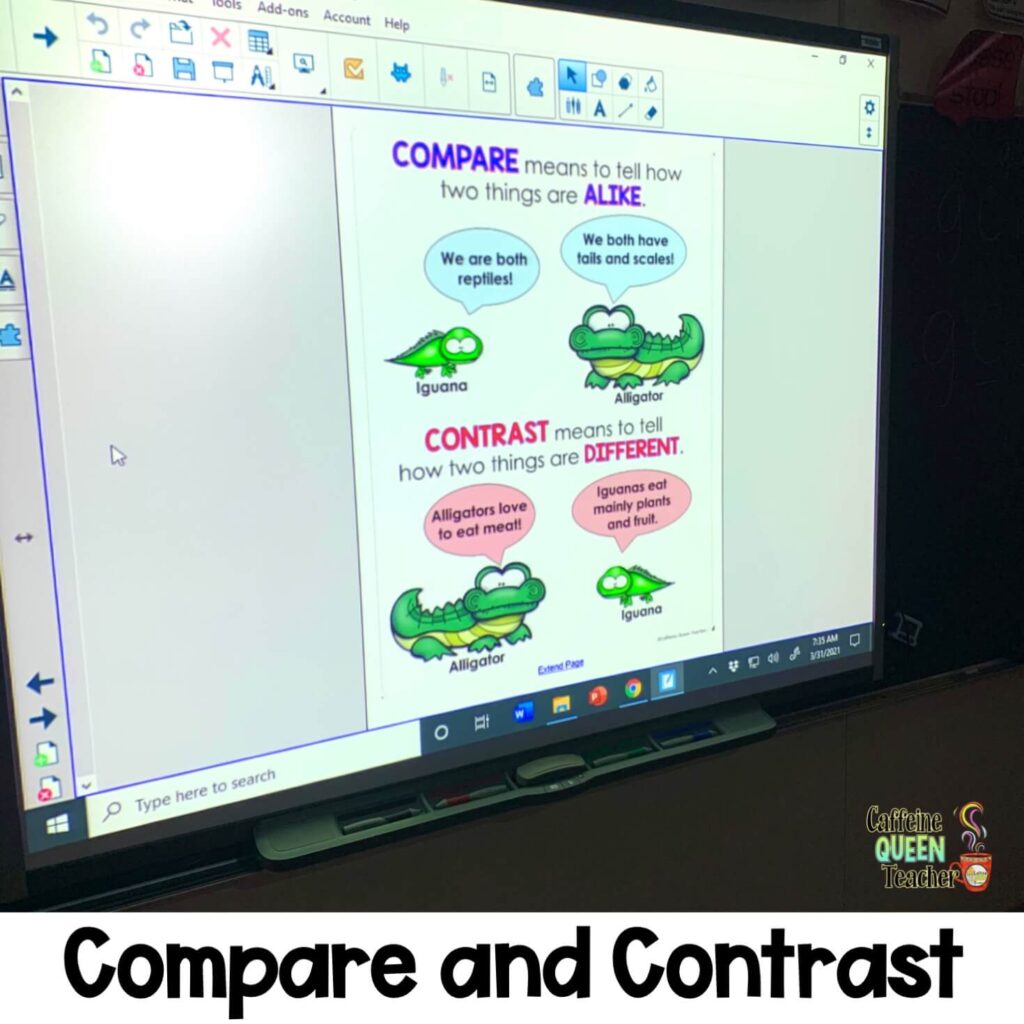
- Compare means looking at two things and identifying how they are similar.
- Contrast means looking at two things and identifying how they are different.
Taking time to reinforce these definitions from the beginning helps students approach the writing process with confidence – especially when tackling paired passages on state tests.
Compare and contrast familiar objects and pictures
I plan at least two days for this activity to help students develop compare-and-contrast thinking before tackling more complex texts.
Day 1: Start Simple
Begin by comparing two familiar, tangible items – things students can see and touch.
I started with physical “things,” like earbuds vs. headphones or markers vs. crayons. If physical objects aren’t an option, use pictures instead, like a bus vs. a car or a cardinal vs. an eagle.
The goal at first isn’t to challenge them – it’s to build confidence.
By starting with clear, recognizable comparisons, students get comfortable identifying similarities and differences without feeling overwhelmed.
Have students identify key characteristics of each item or picture. Depending on their skill level, you can do this together as a class, in small groups, or individually using sticky notes.
Next: Make It Visual
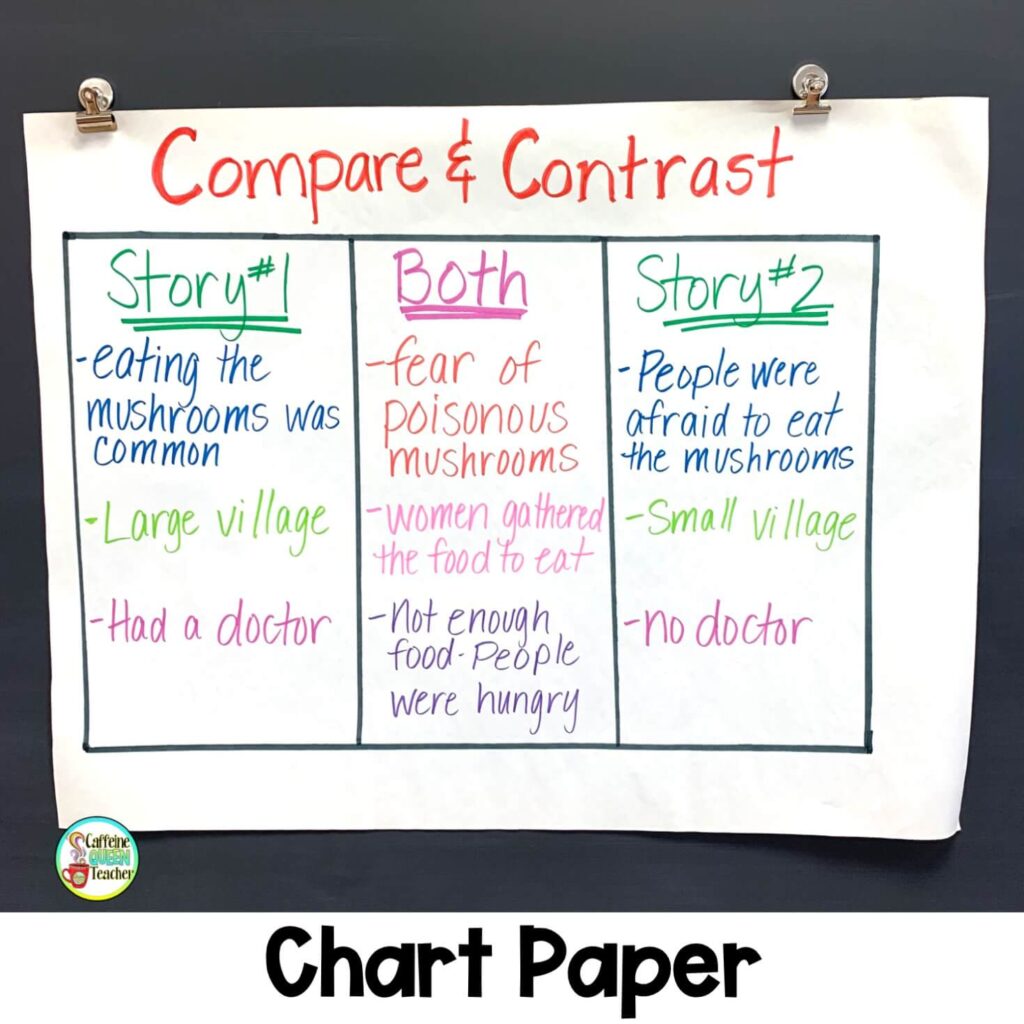
Create a large Venn diagram on an interactive whiteboard, chalkboard, or chart paper.
As a class, discuss the important characteristics students identified and decide where each belongs in the diagram. Try for at least three similarities and three differences in each section to reinforce deeper thinking.
This hands-on, interactive approach lays the groundwork for comparing and contrasting in writing—without jumping straight into essays.
On the second day, follow the same plan but gradually increase independence.
Have students complete a Venn diagram on their own to practice comparing and contrasting. For students who need extra support, pull them into a small group while the rest of the class practices independently.
Compare and Contrast Text
Once students are comfortable comparing and contrasting objects and pictures, it’s time to move on to paired texts. Choose two passages that are connected in some way – similar topics, genres, or themes work well.
Transitioning to Comparing Texts
Moving from comparing concrete objects to analyzing written passages is a big step, and students need time to adjust. Plan for a few practice lessons before they’re ready to dive into full essays.
At this stage, students need to go beyond simply listing similarities and differences. They must compare key ideas from both texts in a way that makes sense—if they mention a detail from one passage, they should also address the same idea in the other. That balance is what makes their comparisons clear and meaningful.
A Common Pitfall to Watch For
Many students focus only on similarities or differences instead of both.
They also tend to compare ideas unevenly. For example, if a student highlights “size” as a key detail in Passage A about animals, they should also discuss “size” in Passage B. Teaching students to balance their comparisons leads to stronger, more thoughtful writing.
Scaffolding the Process
For beginners, follow a structured approach to comparing and contrasting paired readings:
- Read the two texts together as a group.
- Compare and contrast key points, either as a class discussion or with students working individually.
- Model the writing process by crafting a compare-and-contrast paragraph or essay together as a group.
As students gain confidence, gradually release responsibility by letting them take on more of the process independently. For example, you might still read the texts as a class but have students identify similarities and differences on their own.
Worth trying – consider using passages at or just below students’ reading levels. This helps them focus on comparing and contrasting without getting overwhelmed by difficult text.
Step-by-Step Plan for Comparing and Contrasting Text
The following steps outline the approach I used each year to teach students how to compare and contrast paired passages successfully. I typically introduced this process in January and continued developing it through the spring.
1. Break Down Questions and Prompts
Start by modeling how to carefully read and reread the question or prompt. Students need to understand exactly what is being asked before they begin writing.
Take time to break down every word. Teach the meanings of key terms like evaluate, list, explore, and explain so students don’t misinterpret the task.
Have students highlight, underline, or circle important keywords in the question. Then, help them reword the question into a statement they can use as their topic sentence.
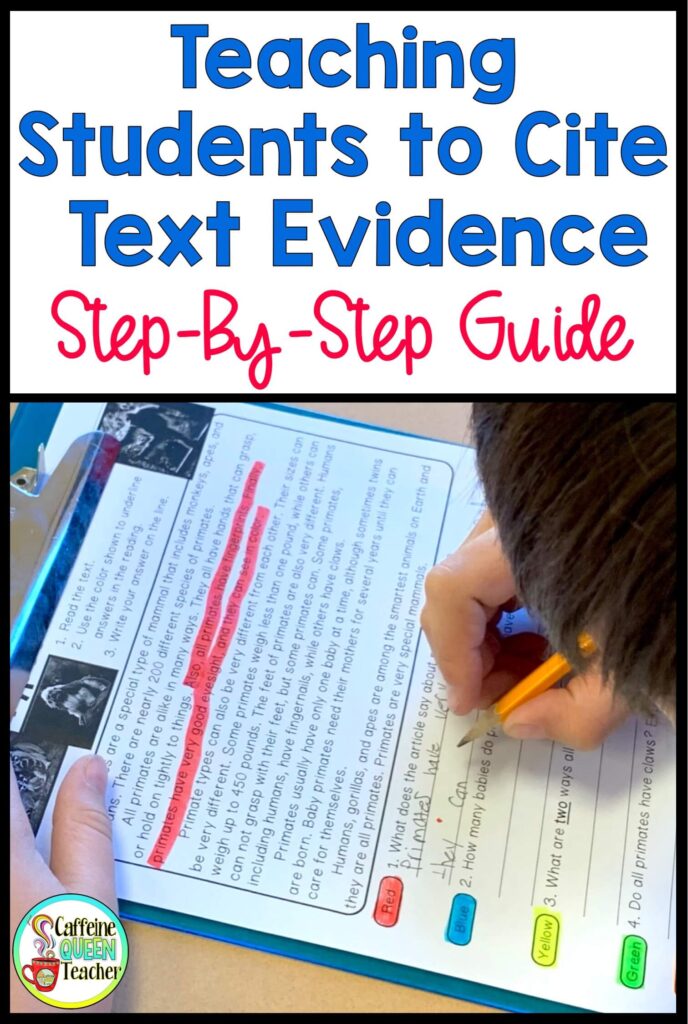
2. Highlight the Passages
For the first read-through, students should focus on understanding the passages without marking them up.
The second reading is when they should start highlighting, underlining, and circling key details that will help them compare and contrast effectively.
This two-step reading approach helps students engage with the text before jumping into analysis.
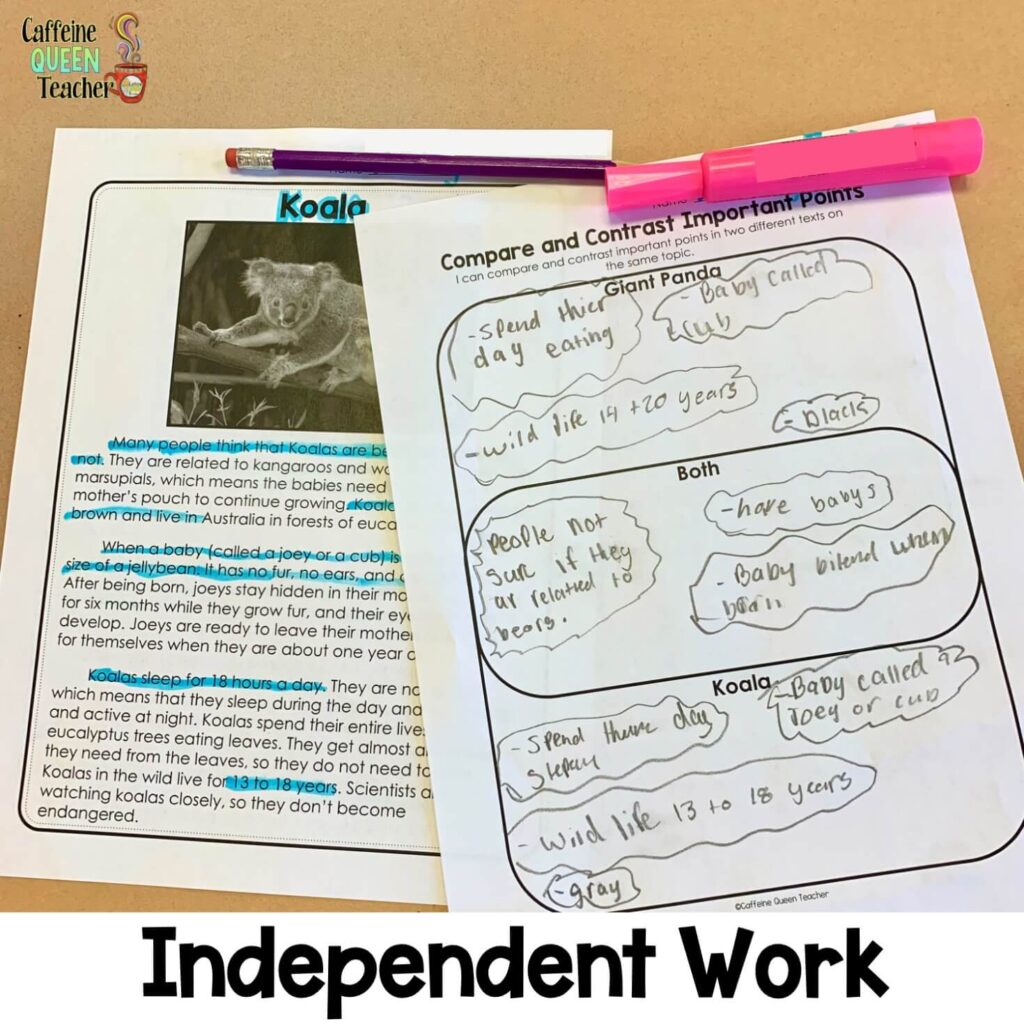
As you introduce scaffolding, have students experiment with using one color to highlight similarities and another for differences.
For a more advanced approach, students can assign different colors to key points. For example, if they’re comparing two animals, they might underline size in pink and prey in yellow. This method helps them visually organize their ideas before writing.
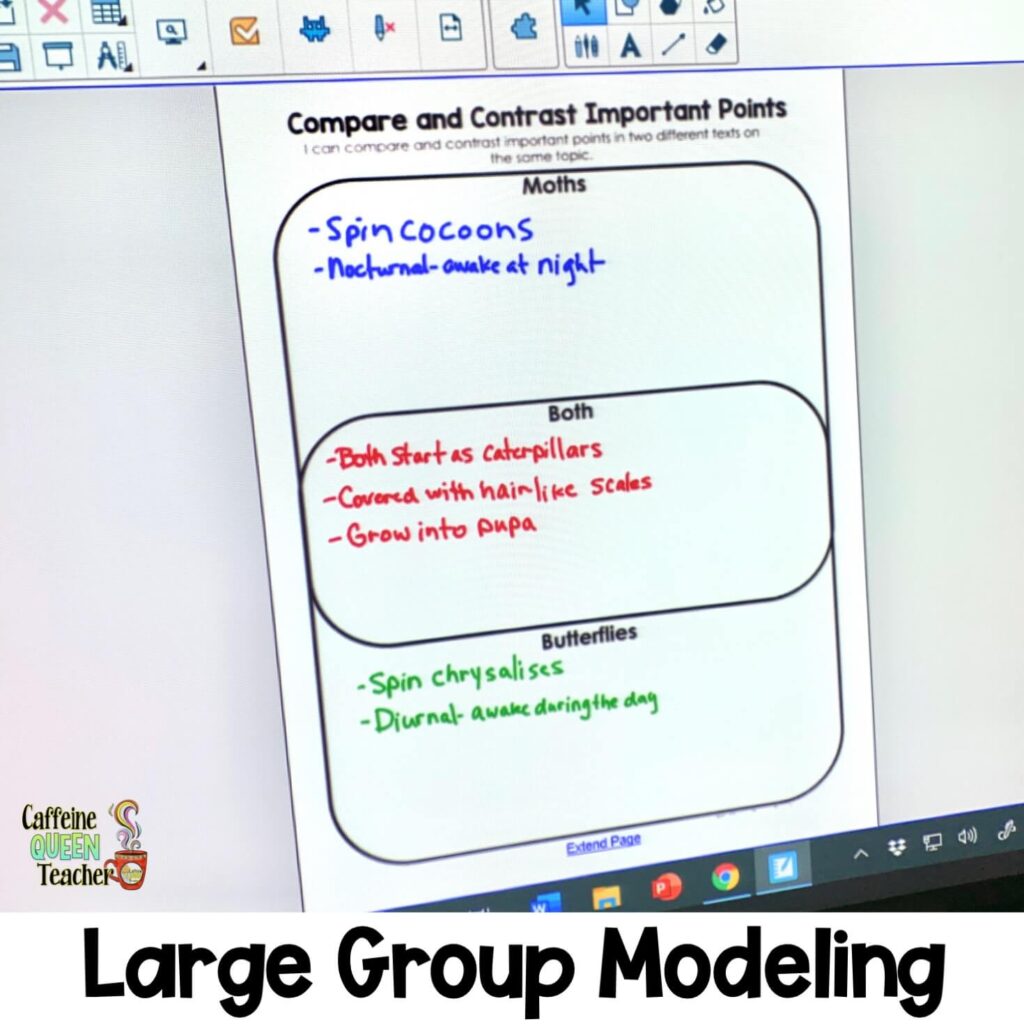
3. Organizing students’ thinking
Now that students have identified key details, they need a clear way to organize them.
Graphic organizers are a great tool for compare-and-contrast questions. Venn diagrams, lists, and other structured organizers help students sort their thoughts before they start writing.
There’s some debate among teachers about whether students should write complete sentences in their organizers or just jot down notes and ideas. Some believe quick notes are best so students can focus on getting their thoughts down, while others prefer organizers to include fully developed sentences as part of the writing process.
Think about what works best for your students. Their skill level, writing confidence, and test-taking needs should guide your approach.
4. Developing Sentences with Sentence Starters
The topic sentence should be built using keywords from the question or writing prompt. This keeps students focused and ensures their responses directly answer the question.
For the body sentences, I introduce a simple formula or structure to help guide their writing. I model how to use sentence starters (also called sentence stems) to get ideas flowing and create strong comparisons.
It’s also important to remind students that their writing doesn’t have to look exactly like their classmates’. There’s no single “right” way to phrase their thoughts – what matters is that they clearly compare and contrast the key points from the passages.
Here are some basic sentence starters:
The first way ______ and _______ are alike is _______ .
Another similarity between ______ and _______ is _______ .
However, a difference between ______ and _______ is _______ .
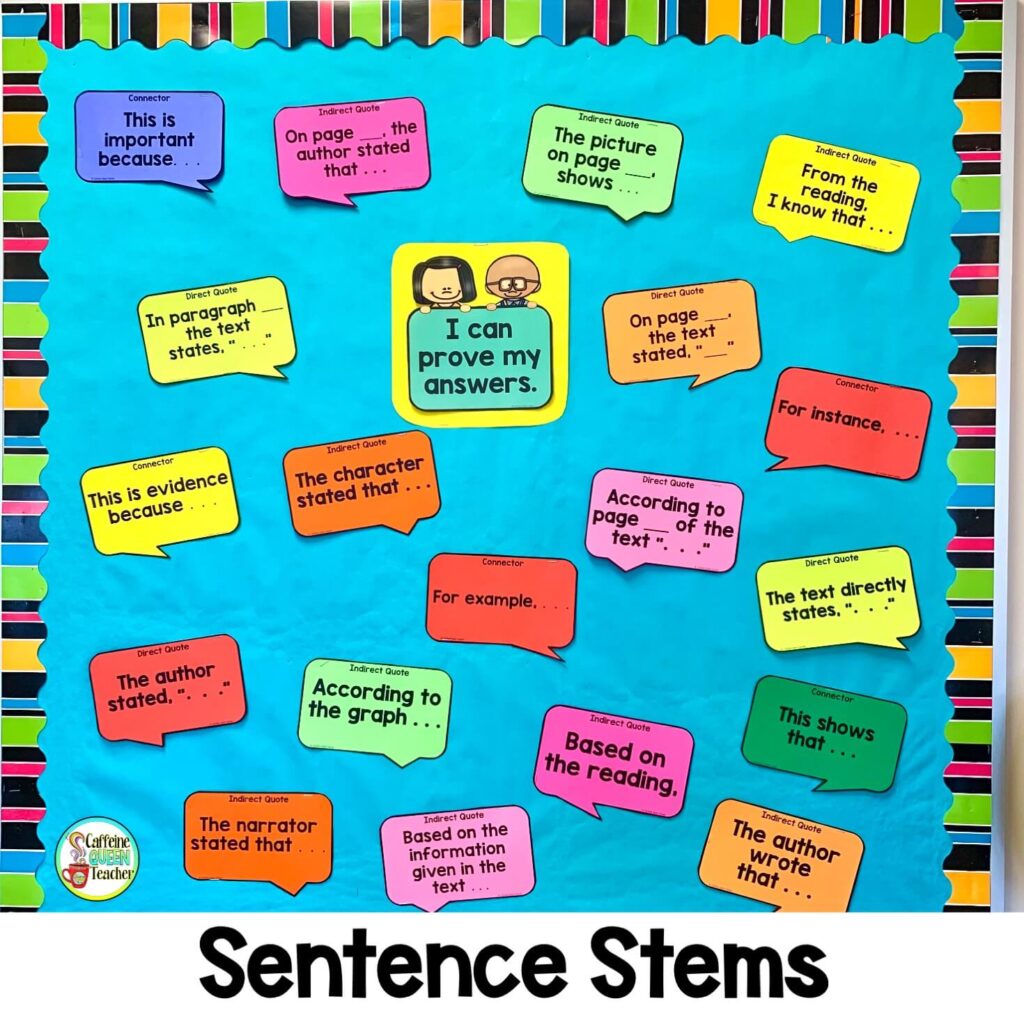
Important Point
At first, students will really rely heavily on sentence stems – and that’s okay. With practice, they’ll gain confidence and start developing their own way of expressing ideas.
Sentence stems act as an important scaffold, especially for beginning and struggling writers.
Some students may struggle with structuring their sentences, while others might have trouble finishing their thoughts in a clear way. They may need help choosing the right words, organizing their ideas, or understanding how to connect their points.
Giving them support early on helps them develop these skills, so they can eventually write with confidence on their own.
5. Developing Paragraphs
For beginning and struggling writers, a clear structure makes all the difference. I’ve found that it’s easier for them to write separate paragraphs for similarities and differences rather than alternating back and forth. This approach, called block format, gives students a solid framework to follow.
Block Format:
- Introduction – Introduce the items being compared/contrasted
- Body Paragraph 1 – Similarities between the two items
- Body Paragraph 2 – Differences focusing on the first item/topic
- Body Paragraph 3 – Differences focusing on the second item/topic
- Conclusion – Summarize key points and wrap up the essay
Another structure, known as the alternating (point-by-point) format, compares one specific point at a time, discussing both similarities and differences within each paragraph.
Alternating (Point-by-Point) Format:
- Introduction – Introduce the items being compared/contrasted
- Body Paragraph 1 – Similarities and differences related to Point #1
- Body Paragraph 2 – Similarities and differences related to Point #2
- Body Paragraph 3 – Similarities and differences related to Point #3
- Conclusion – Summarize key points and wrap up the essay
To keep students from feeling overwhelmed, choose one structure and have them practice it consistently. Less experienced writers may struggle if they try learning both at the same time. Start with one, and as they build confidence, introduce the other if needed.
6. Remember to Use Transitions
Strong transitions make all the difference in a compare-and-contrast essay. They create a smooth flow between sentences and ideas while guiding the reader through each connection
Take time to discuss the meanings of transition words with students. Many students struggle to understand the small but important differences between them. For example, however and on the other hand both show contrast, but they aren’t always interchangeable. Likewise, similarly and in addition may seem alike, but they serve different purposes.
Students need to understand not just what transition words mean, but why one might work better than the other in a certain sentence. Using real examples helps students see how transitions make writing clearer and more effective.
Final Thoughts on Comparing and Contrasting
Remember – practice makes permanent! The more students work on these skills, the more natural they’ll become. Using a gradual release approach gives them the support they need at first while allowing them to build independence over time.
Looking for compare and contrast activities?
Want to make teaching compare and contrast easier? My Compare and Contrast Paired Passages Set is designed for grades 2-4 and takes the prep work off your plate.
With both printable and digital versions, it’s a ready-to-use resource that helps students build these essential skills – while saving you time!
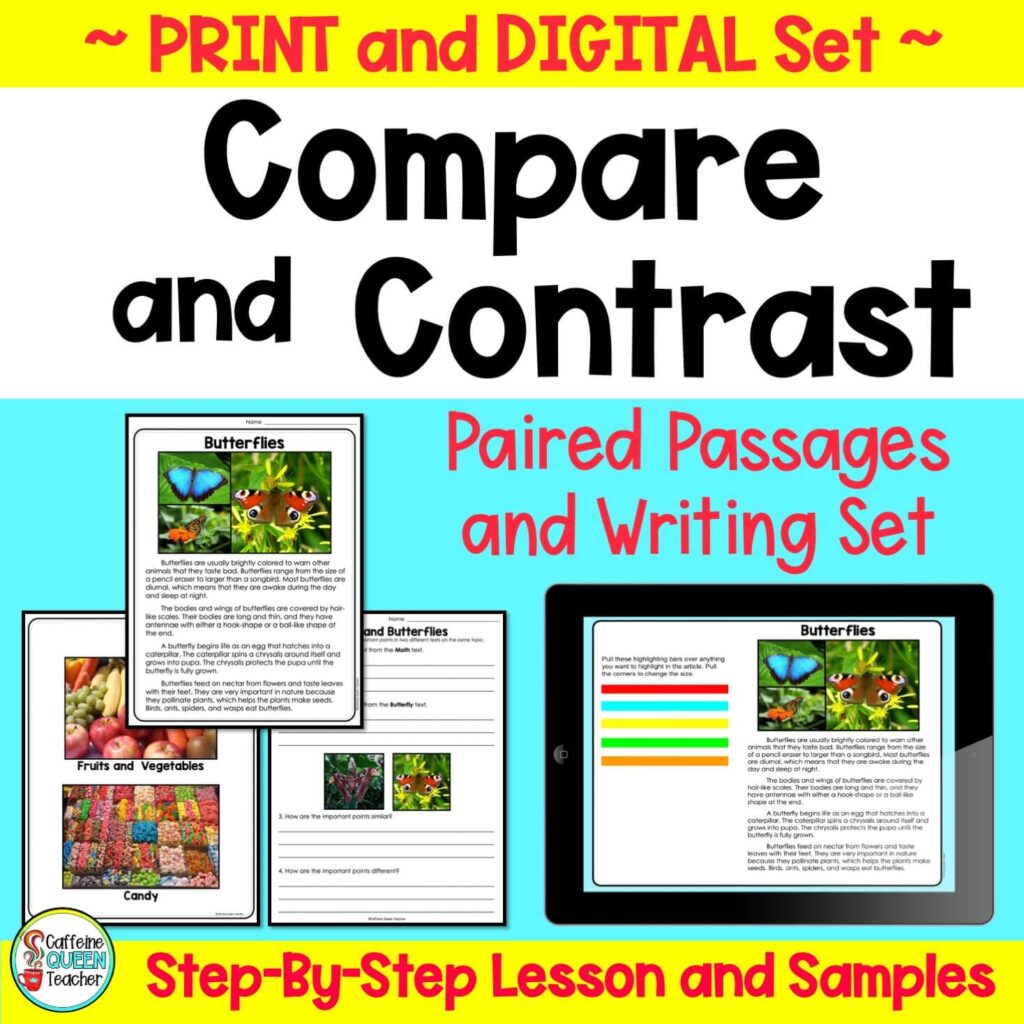
Compare and Contrast Paired Passages and Writing Set – Give your students the tools to confidently compare and contrast informational texts!
This set includes engaging pictures, paired passages, and supportive posters to guide their learning. Whether you prefer printable resources or digital assignments through Google Drive or Google Classroom, this set makes teaching compare and contrast easier and more effective
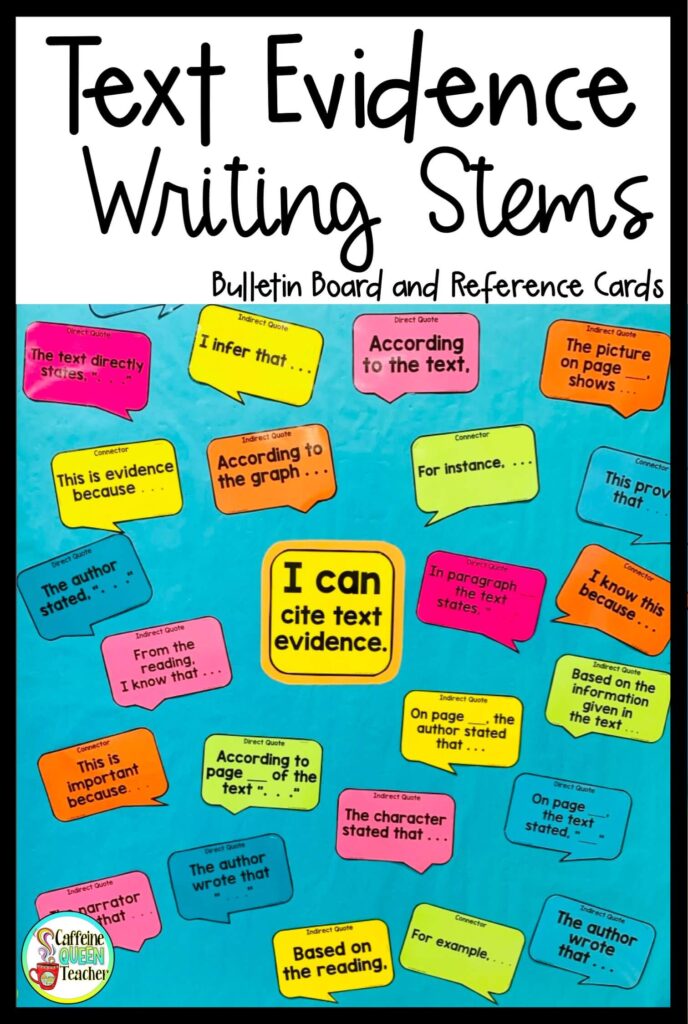
Sentence Starters for Writing and Citing Text Evidence – Help students craft strong, well-structured responses with this mini-poster set of sentence stems!
These sentence starters give students the support they need to write high-quality answers when responding to text-based questions. Perfect for classroom bulletin boards, this resource serves as a quick and easy reference for building better writing skills.
Related Articles to Learn More:
Prepare for Testing with Writing Stems – Writing stems help students tackle constructed response questions by guiding them in citing evidence from the text. Learn how to easily use them in your classroom.
How to Teach Students to Cite Text Evidence – A step-by-step guide to helping students identify and use textual evidence effectively when answering text-based questions.
No-Stress Test Prep: The Ultimate Guide: This guide shares five powerful, teacher-approved methods to help students master key skills like citing text evidence, using the RACE strategy, and tackling paired passages. Make test prep engaging, effective, and frustration-free!
If you found this article useful, please follow me at my Teachers Pay Teachers Store, Pinterest, and Facebook!
About the Author
Written by Jules Rhee, MEd, and a 30-year teaching veteran; published 4/22/2021; Last updated 2/20/2025.
Jules is the creator of Caffeine Queen Teacher (CQT) – Visual Math Organizers + Graph Paper Support. She’s a veteran teacher with over 30 years of classroom experience (SPED, upper elementary, and middle school) and a Master’s in Education (MEd). Jules shares practical, classroom-tested ideas and creates step-by-step resources that help students stay organized, confident, and successful – especially with multiplication and long division.
Read more about Jules here: About Page | Browse resources here: TpT Store